 Tieddr Pro Screen
Show a workflow that moves between applications.
PRO SCREEN FEATURES
Screen recording.
Editing included.
Record on Windows, cut the pauses, add a zoom, and prepare a video to share—all in the same app.
Actual development-build footage below. Check the published release for current availability.
THE EDITORKeep the take.
Keep the take.
Cut the waiting.
Split at the playhead, remove a pause, and play across the join. Your footage, zooms, annotations, and audio stay on separate tracks.
Learn the timeline controls ↗RECORDINGChoose what
Choose what
people see.
Capture an entire display, one application window, or a selected region. Check your microphone and camera before you start.
Choose a recording source ↗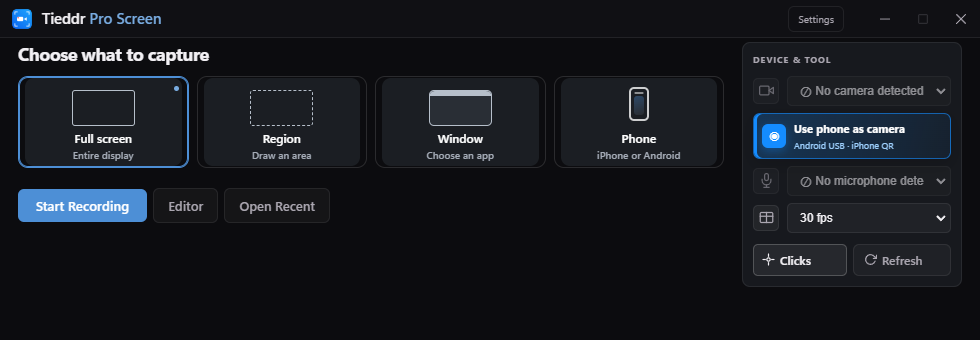
ZOOM & FOCUSBring the
Bring the
detail closer.
Add a zoom where the viewer needs to read a label or follow a control. Set its focus, strength, and timing in the editor.
Automatic suggestions depend on the cursor and click data captured. Every zoom still needs a quick review. Larger source footage gives you more detail to work with.
How screen-recording zoom works ↗BACKGROUNDS & FRAMINGGive your video
Give your video
some space.
Choose a background, then adjust the space around your recording. Corners and shadows help separate the footage from its surroundings.
Make your first edited recording ↗ANNOTATIONSPoint to what
Point to what
matters.
Add a label, box, arrow, or spotlight at the moment it is needed. Adjust its position in the preview and its duration on the timeline.
Need to hide information? Review masks throughout the exported video. Blur does not remove private content from the original project.
Work with annotations ↗A pointer people can follow.
Adjust size, style, and smoothing on compatible cursor-free footage. Baked-in window or phone cursors are different: they cannot simply be replaced by styling controls.
Cursor and capture requirements ↗Make room for the explanation.
Generate English captions locally after downloading the model, or import an SRT file. Review the words and timing before exporting.
Add your own audio or browse the Jamendo catalog. Mix the track under your voice, and check its license before publishing.
Caption guide ↗Music and licensing ↗Control stays with the project.
Caption text, audio timing, and other edits remain adjustable. Save the project as well as the final video.
PHONE & CAMERATwo different jobs.
Two different jobs.
Two clear entry points.
Show what happens on your phone, or use its camera to show yourself. Screen mirroring and phone-camera setup have separate controls.
Record the phone screen.
Android starts with USB, with wireless pairing where supported. iPhone screen mirroring connects through the AirPlay receiver on a trusted local network.
Phone mirroring setup ↗Use the phone camera.
Choose Phone as camera from the camera controls. Android uses USB; iPhone uses a browser camera link and online connection services. Wait for a live image before recording.
Phone camera setup ↗Device, permission, and network requirements apply. These descriptions are not a live hardware demonstration.
EXPORTReady for
Ready for
the next screen.
Choose MP4, WebM, or a silent GIF. Set the output size, review the rendered result, and save the file where you need it.
Higher output resolution cannot restore detail missing from the source. The recording here shows settings, not a completed render.
Choose export settings ↗Start with a short take.
Record a small workflow, edit it, and check the export on the screen where it will be watched.